Chroma Key and Waveform
Here’s an pretty cool tip for those young filmmakers out there experimenting with Green Screen / Chroma Key.
In the process of recording a subject in front of a Green Screen, first and foremost make sure you have the desired framing of the person: a medium shot, a close-up or a wide shot. Then ask politely to the actor to step aside, and now your entire frame should be filled with green, or at least part of it.
Now, activate the Waveform window on your camera settings. Some cameras have it, others don’t, and some you can hack with a software that rhymes with Tragic Panther.
Normally, a waveform looks like this, if it’s analyzing an image with lots of colors and have objects that disrupt the luma levels:
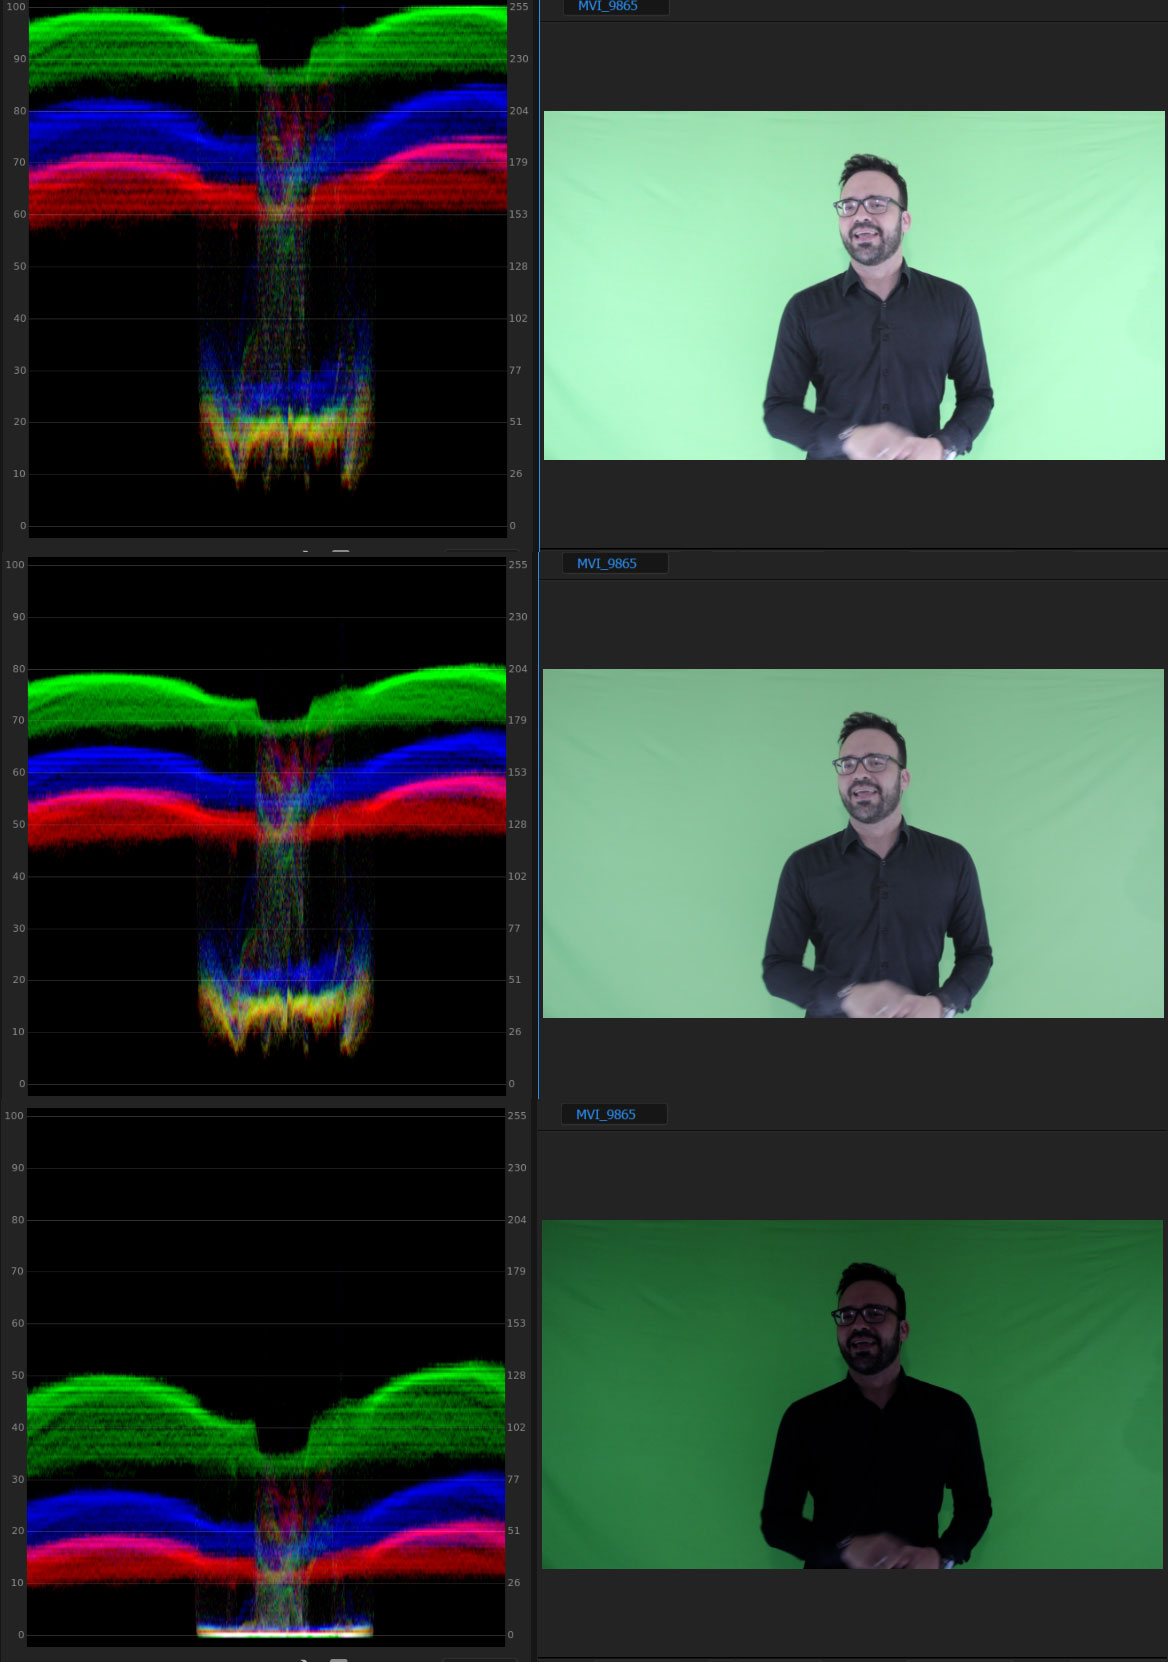
But, if we have an image that is completely green, it will look like three lines, depicting the three colors Red, Green and Blue:
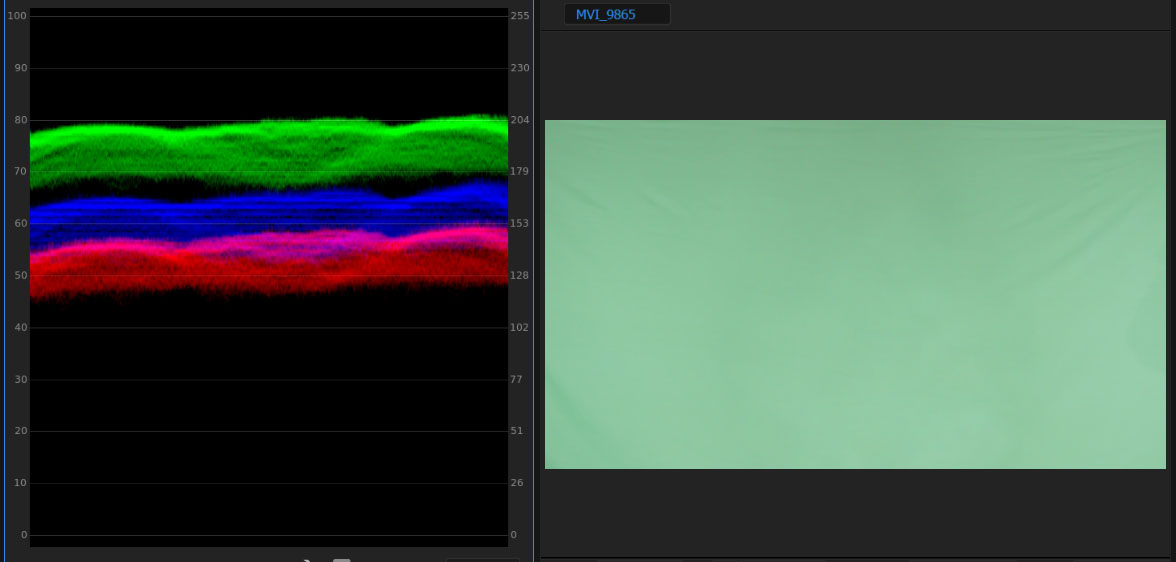
If the entire frame have equal levels of green, meaning, the Green Screen is lighted properly, it should look like three flat lines in the waveform, and if you change the waveform to Luma, you will see the entire image as one wave. If you see any type distortion on that line, you need to check the position or distance of the lights.
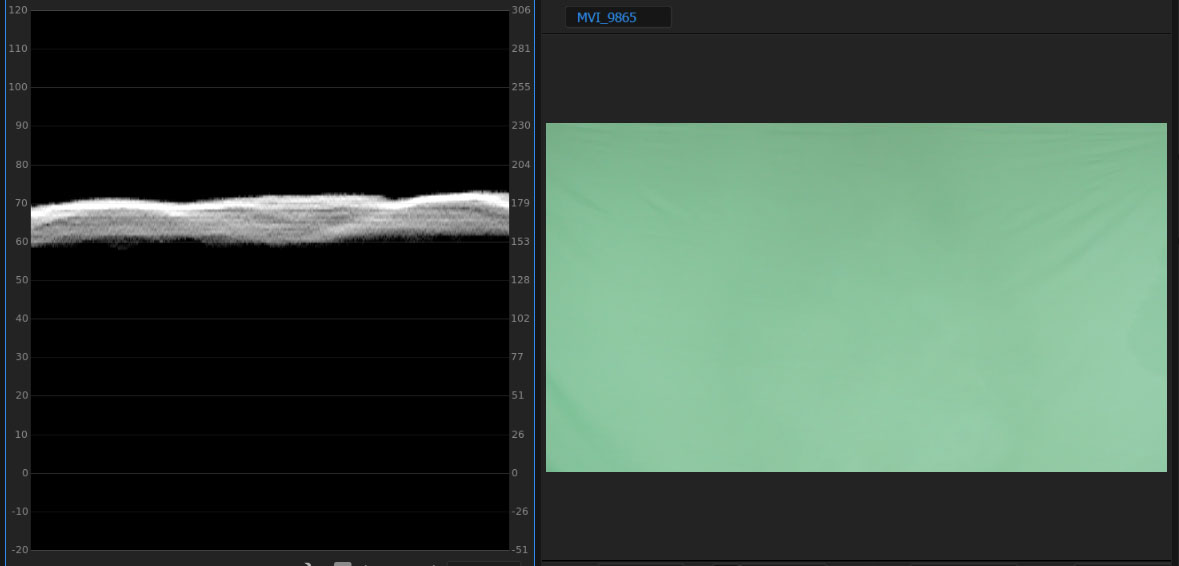
Now, the best part of this tip is the position of the line in the waveform: it should be exactly in the middle.
Why? Because that means the green is perfectly exposed in the camera. This will make extremely easy the process of keying out the Green Screen in your software of choice during post-production.
To move this line in the waveform, you need to play with the camera settings until you under-expose or over-expose the image. You can adjust the ISO setting, the Aperture and the Shutter Speed. You need to be careful, because you’ll want the least amount of Motion Blur, so you shouldn’t touch the Shutter Speed settings (motion blur will make your life miserable in Post-Production if you are doing Chroma Keying).

